Now I’m back from the medieval
event, and it will be mentioned in a few posts, as I didn’t have time before to
blog about all the things I made for it. If you want to see pictures now, you
can go to my groups Facebook page.
My one year old could use his brother’s old shoes, though being a wee bit too large,
but my three year old needed new ones. I have been to this event before, and
know the terrain. Though our usual camp spot is grassy and pleasant, you have
to walk on both cobblestones and gravel to reach the bathrooms. Also, there’s
no knowing what the weather will be like, not to mention the possible danger of sharp objects. So I had to make him shoes.

His old shoes were boots,
which were secure enough to stay put even on small toddler feet, but now he’s old enough not to kick of his
shoes by accident. I decided to make him a small version of the Bocksten Bog
man’s shoes, dated to the 14th century. It’s a model I’ve made
before, so I had an idea about how the pattern pieces should look. Now, I’m
decidedly not a shoemaker, so if you are proficient at this, brace yourself. If
you have any handy advice, please share. I hope to become a decent shoemaker
sometime in future.
First I traced his
foot on a piece of paper, and then used that to draw a sole. I drew an upper
to. I made a mock-up from them - too small. The second attempt, seen here, worked
well, with minor alterations.
And this was the final pattern.
I used leather I had
at home, 1 millimetre for the uppers, and 2 millimetres for the soles.
I put a
welt between the sole and upper as I sewed, for strength and durability.
I also stitched a
piece of leather to support the back of the shoe. Not puncturing the right side of the leather uppers was tricky, but I only messed up once.
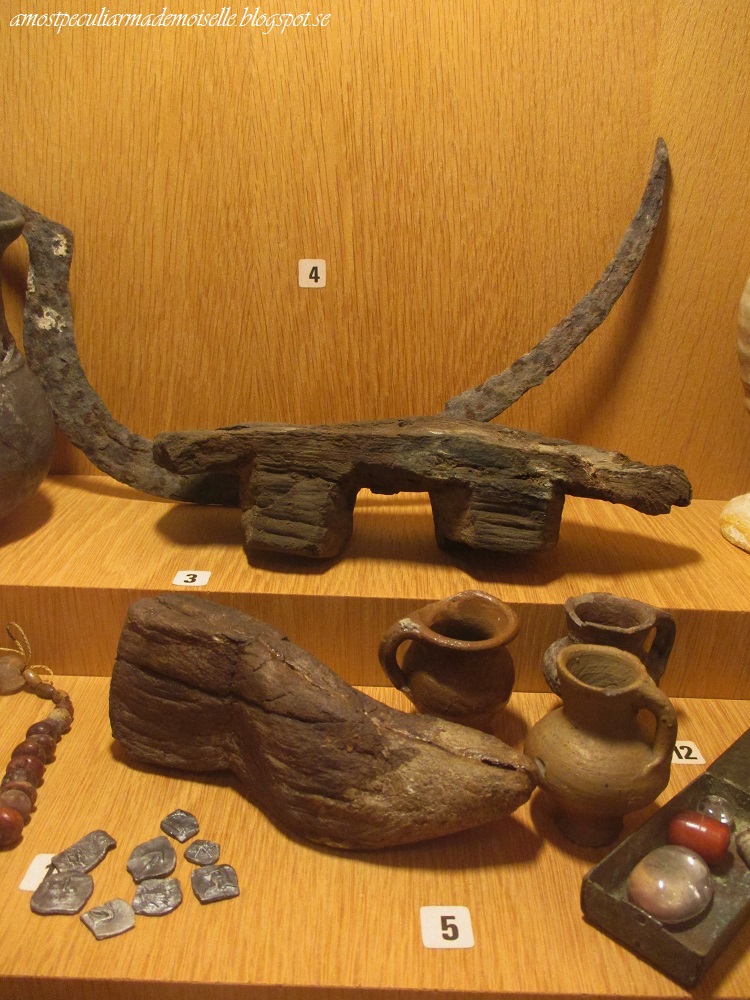
Medieval shoes were really
sewn on a last, like this one (number 5) for a child’s shoe in Malmö Museer, but I’m not
there yet. I’m terrible with woodwork.
I did try one thing to
get closer to historical accuracy though: I did not use needles when sewing. In
period, the waxed linen thread was twisted round a bristle, but as I don’t have
any, I used fishing line instead, as advised by Sofia and Henrik. It took a bit
of practice – at first it wouldn’t work at all, but after more advice and
practice, it worked quite well, and I can see it working excellently with more
practice.
In short, and to my
understanding, this is how it works: you take your linen thread, and unravel the ends a bit, and
pluck at the ends to make them uneven. You wax the thread, and twist it, with its unravelled ends, round the fishing line, which has been
sandpapered for friction. The plucked, uneven ends of the thread makes the
transition from thread to line smooth, and will slide through the holes made by
the awl easy enough. This makes for smaller holes than a doubled thread and
needle would require, and in shoes, this is a good thing.
I believe that to be
more accurate, I should have let the holes in the soles be at an angle, from
inside to the side of the sole, instead of straight trough from inside to
outside, but I decided one new thing was enough for his project, for which I
had some time pressure. I’m keen to try to make angled stitches though, they
make for a much smoother and more elegant result.
After sewing was
finished, I dipped the shoes in water to make them more flexible (of course the
shoes were also wet when I stitched them), and then turned them, letting them
dry with rolled up pieces of terry cloth in them to keep their shape. I then greased
the shoes (which darkened them a lot – rather nice, I think), added laces, and
they were ready to go.
They were finished before the deadline of the HSM
challenge #6 – Out of Your Comfort Zone.
The Challenge: # 6 - Out
of Your Comfort Zone
Fabric: 1 millimetre
leather for the uppers, 2 millimetre for the soles.
Pattern: Drafted and
draped my own, based on period shoes.
Year: 14th
century
Notions: Linen thread.
How historically
accurate is it? OK, I suppose – I don’t think it would stand out too much if
sent back in time, though likely seen as the early work of an apprentice. There
are a couple of period techniques that I did not use, and of course that affect
the result. Still, one point to me for giving up sewing with needles!
Hours to complete: Not
sure, possibly about 20.
First worn: At a medieval
event last weekend.
Total
cost: Not sure how much it would have been if the materials were bought new, but
at this time it didn’t cost me anything, as everything was in my stash.